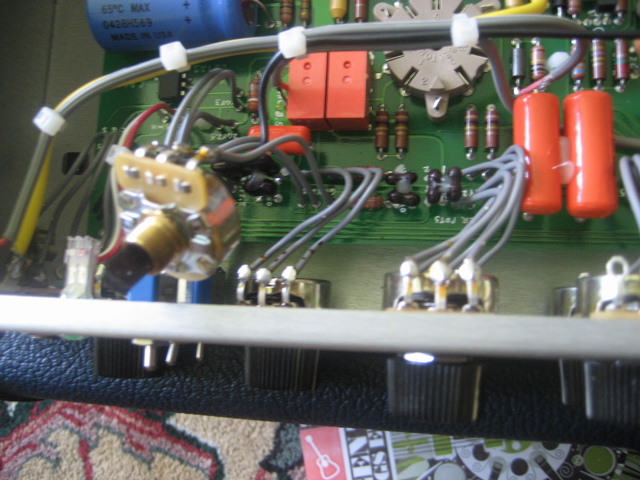
LSC/LSS owners; are you happy with channel2?Want to fix it?

The Boogie Board

Help Support The Boogie Board:

This site may earn a commission from merchant affiliate links, including eBay, Amazon, and others.
sbalderrama said:
Spikey Si said:
I will have another fiddle with ch2 as it, but I tend to think that I will end up doing the mod as I always gravitate towards ch1 and currently use a tube screamer to boost the gain when needed rather than switch to ch2. If ch2 was identical to ch1 (a la reeder ) then the extra gain stage should do the trick without the need for pedals.
Thanks again for your help!!

Try keeping the gain control quite low on C2 ( 9 oclock and below) and then use the drive control to push the channel, basically like sticking a tube overdrive in front of C1. Its possible that the Reeder mod may still have a slightly more open sound than doing it this way due to some aspect of how pots are manufactured, but for me this works really well. I usually run the gain a bit hotter since I like the extra compression for leads. Because of the pot taper, the Gain pot on C2 is very touchy in it's lower range.

Thanks for the tip, I'll give it a go!
 
Holy S@#t!!!!!!! I did the Reeder Mod today and it's amazing how open and lush it makes channel two with the drive engaged. The distortion is very articulate. It's only been half an hour, but so far I have been having fun A) enjoying the incredible new tones and B) setting up a killer three channel like setup by adding my Barber LTD SR to the modded ch.2 for even more grit.

The sound is incredible. I'll post more of my thoughts after we get to know each other better.
 
To Mr. Reeder,

Thank you for figuring this out and giving it a try and telling us about it. What a huge payoff for such a simple mod. I've hardly stopped playing to eat since yesterday. It's incredible.
 
Holy S@#t is right!!!!!
Another happy camper after doing the Reeder Mod!
Can't see using the amp any other way....?
Sounded very compressed and lifeless with one of those quilted moving company blankets over it before the mod.
Trying to understand why anyone would like it any other way.
This mod has made this amp a complete tone monster.
Thank you all and of course, Charles. :D
 
Right, that settles it. I've got a gig this weekend so will leave it for now (just in case...) but next week is Reeder Time!
 
I thought about that but it was too late. The mod was done on the bench at work and I didn't think about bringing a camera until I was already there.
 
creekhed said:
has anyone taken pics of the process while performing the mod? that would be helpful to us non-experts...
I did, though I'm not sure they're helpful. I'll post later today.
 
creekhed said:
has anyone taken pics of the process while performing the mod? that would be helpful to us non-experts...
Here are a few. I took these while I did the mod, though looking at all of them I realize that a some point I pretty much just focused on the work, and neglected to get pictures of every step. Looking back I wish I'd captured:

- Sticking a plastic spoon under my soldering job, to protect the circuit board in case I dripped solder.
- Marking the leads before disconnecting them from the pots.

Anyway, I also was planning to write all of this up sometime, but maybe it isn't all that much of a story... just be really really careful and don't electrocute yourself on those caps... they will kill you if you don't know what you're doing.

Otherwise, there isn't much to learn here except to see what the insides look like. It's pretty tight in there, which is the Mesa Engineering "thing". One other trick is to leave the chassis pretty much in the box, but use the back panel thing as a strut to keep it afloat while you work; that way you can leave the tubes in and everything.

3.jpg


4.jpg


5.jpg


6.jpg


8.jpg


9.jpg
 
creekhed said:
has anyone taken pics of the process while performing the mod? that would be helpful to us non-experts...
Here are a few. I took these while I did the mod, though looking at all of them I realize that at some point I pretty much just focused on the work, and neglected to get pictures of every step. Looking back I wish I'd captured:

- Sticking a plastic spoon under my soldering job, to protect the circuit board in case I dripped solder.
- Marking the leads before disconnecting them from the pots.

Anyway, I also was planning to write all of this up sometime, but maybe it isn't all that much of a story... just be really really careful and don't electrocute yourself on those caps... they will kill you if you don't know what you're doing.

Otherwise, there isn't much to learn here except to see what the insides look like. It's pretty tight in there, which is the Mesa Engineering "thing". One other trick is to leave the chassis pretty much in the box, but use the back panel thing as a strut to keep it afloat while you work; that way you can leave the tubes in and everything.

3.jpg

Using the back panel as a support for the chassis. It slipped once (ouch!) but the tubes survived and all was well.

4.jpg


5.jpg

1-2-3 dots on the leads for the Master control. As you can see, the leads are not long and you'll be soldering over the circuit board (thus the plastic spoon trick -- perhaps the more electrically-inclined among us have a standard way of dealing with this).

6.jpg

Ditto for the Gain.

8.jpg

Gain pot in front of its original position.

9.jpg

Master pot in front of its original position.
 
sbalderrama said:
how did you drain the caps before doing the mod?
I did what my amp tech told me to do: play a chord while the amp is on, and then unplug the amp while it's ringing. Doesn't drain them 100%, but it gets them down to 15-20 volts, which isn't enough to hurt you. And then I was just really careful. :)
 
Hello everyone:

I've been away for about a month...and never even checked on-line once during that time! (Hey! that's pretty remarkable, huh?)

Anyway... when I finally checked a little while ago;I was floored by the number and quality of responses during that time. Great work... and thanks to everyone... who has 'championed' the 'cause'!

Seems the best 'stuff' happens when I keep my nose out of things! Ha,ha.

Since my only motivation in presenting the 'mod' was so that others could get the same sound out of their Lone Star as I do...I can only say that I am now growing happier by the day!

Too all who have offered their thanks...you are most welcome...your 'sweeter' sounding 'Lone Star' and the smiles that go along with it are my reward.

Regards: Charles Reeder
 
Hi all.

I have read this thread with interest. I am however amazed that those of you who "do the mod" are so excited. I agree that the taper on the pots are different but you can get EXACTLY the same results by keeping the Ch2 gain LOW and the master HIGH. I can get my 2007 LSC to sound EXACTLY the same on both Ch1 and Ch2 by:

Ch 1 Gain = 12:00 Ch 1 Master = 1:00
Ch 2 Gain = 8:00 Ch 2 Master = 4:30

All other settings are the same. 10W on both channels and Tweed on power.

I actually like setting CH2 different which MUST be the point of having a second channel.

I have no doubt thet the mod is unnecessary as you can achieve EXACTLY the same results by turning the knobs!!!!!!!!!

Sorry for being so contraversial!!!!!

Jon
 
jonp said:
Hi all.

I have read this thread with interest. I am however amazed that those of you who "do the mod" are so excited. I agree that the taper on the pots are different but you can get EXACTLY the same results by keeping the Ch2 gain LOW and the master HIGH. I can get my 2007 LSC to sound EXACTLY the same on both Ch1 and Ch2 by:

Ch 1 Gain = 12:00 Ch 1 Master = 1:00
Ch 2 Gain = 8:00 Ch 2 Master = 4:30

All other settings are the same. 10W on both channels and Tweed on power.

Jon

Those setting would only be relative to way that you have your ch 1 setup as far as making a match. Plus in the stock config you don't have the ability to interplay different levels of Drive, Gain, and Master on ch 2 to get the different tones that we are getting.
 
djw,
Those pics are very useful. I've always want to know what the inside looks like.
How do you remove the chassis? I mean what set of screw do you need to remove first so the chassis don't fall of when you undo the last one. I see that there're 4 screws from the top where the handle is and a 'ground' screw that goes from the bottom of the chassis and into the top of the cabinet. So 5 screws and is that it?
 
Those setting would only be relative to way that you have your ch 1 setup as far as making a match. Plus in the stock config you don't have the ability to interplay different levels of Drive, Gain, and Master on ch 2 to get the different tones that we are getting.

Rubbish. Pots are pots!!!! All they do is let signal through. They may vary in taper (how much you need to turn them) but they allow zero signal or full signal - nothing else - unless we are talking some sort of mythical stardust going on here.
 

Latest posts

Back
Top