Want Pre500 tone? Here's how to get it!

The Boogie Board

Help Support The Boogie Board:

This site may earn a commission from merchant affiliate links, including eBay, Amazon, and others.
JCDenton6 said:
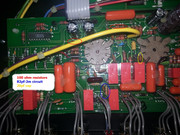
I could've sworn that wire was there to reduce microphonics and other noise from V3 in the earlier Rectos IIRC :|
Really? This one is on V2. I'm wondering how this could work? Parasitic/coupling inductance etc?
Puzzling indeed.

Cheers,
Hugh.
 
HughMan said:
Really? This one is on V2. I'm wondering how this could work? Parasitic/coupling inductance etc?
Puzzling indeed.

Cheers,
Hugh.
This conductor is there on all 2 channel Rectos to my knowledge. There's a discussion about it in the thread below. Apparently, it seems to be there for hum reduction purposes:

http://music-electronics-forum.com/t20724-2/

Most it's importance to the circuit must've been very minor and likely mitigated some issue from the PCB layout.

And thanks for confirming the presence pot value.
 
Shemham said:
HughMan said:
Really? This one is on V2. I'm wondering how this could work? Parasitic/coupling inductance etc?
Puzzling indeed.

Cheers,
Hugh.
This conductor is there on all 2 channel Rectos to my knowledge. There's a discussion about it in the thread below. Apparently, it seems to be there for hum reduction purposes:

http://music-electronics-forum.com/t20724-2/

Most it's importance to the circuit must've been very minor and likely mitigated some issue from the PCB layout.

And thanks for confirming the presence pot value.
Thank you for the link to discussion on this.

Ok then, so it would appear that for hum reduction this setup provides negative feedback.

Cheers,
Hugh.
 
Hiya guys! (really sorry to necro but I really wanted to let you guys know how the mods went for me in 2021!!)

First I'll say that I'm in absolute gratitude toward this thread for such amounts of information and knowledge. I've visited this thread continuously since 2012 but never felt confident enough to carry on such modifications on my Mesa amps. Back then I just ventured to perform the FX loop series/parallel mod. But time went on and I started working a lot with electronics/soldering and repairs while still making music so I gave the thread like 3 full reads and analysis. I feel a lot more confident now with components, terms, diagrams, soldering, safety so went ahead with the mods!

- Replaced CH3 gain pot (it was 230k stock, measured it) to 1Meg and left the cathode resistors untouched: Instant tons of gain, while mushy around 8 to 9 o'clock. Still, much better! — This is a 2006 3CH Solo Head. It always sounded like crap for tighter tones and always did Ok with vintage 'Brown sound' stuff. It always felt odd and was always stashed away at home. Using a clean boost was an absolute need for like 80% of the applications.

- Jumped (didn't clip) the cathode resistors on V1 to V3: cleaned up my tones overall, and I'm pretty happy now!! I play a lot of hardcore and this is what I always wanted! It's an absolute shame it took me so much time to finally dive in! Jumping the cathodes resistors definitely solved the clarity issue once and for all.

- I'm replacing the CH2 gain pot from 225k to 500k. I recon it will work just fine.

It took me a morning to test and apply these two mods, so far too good.

Just a couple things that hoover around my mind.
- I don't tend to run super bright, edgy tones. The mods before mentioned feel superb. With this in mind, would clipping out the resistor/cap + cap circuit help? or would it be too much? I did notice my DR turned a bit more noisy but I'll manage.

- You guys mentioned that placing a parallel cap between D & E power rails would make a 3CH `feel´ closer to a Pre500. How could I locate in the board a proper spot to place it? What would be the effect of such mod tone wise?

- Is there a viable way to slightly tame the granular top top end after all these mods? I know it's part of what makes Rectos what they are, but I had to ask! :b

One more thing, why is there so little information about all these mods? There's no one doing videos about it in YT, just samples (which sound sick lol)!

Hoping to read from you guys,
All the best
JB
 
Hi ti all,

I've done all the mods explained (Page 28).
The amp in now a Beast.
The only problem i have Is a certain hum in Orange Channel clean mode. In Orange mode and Red Channel no hum at all.

Can you help me ti solve the problem?
I have Just Unsoldered One side of r322 and C10, should be the same as removig.
I have stock condensers in gain pot 0.001 uf with 1 meg pot.is It ok?

Thanks
Matteo
 
jb_stems said:
Hiya guys! (really sorry to necro but I really wanted to let you guys know how the mods went for me in 2021!!)

First I'll say that I'm in absolute gratitude toward this thread for such amounts of information and knowledge. I've visited this thread continuously since 2012 but never felt confident enough to carry on such modifications on my Mesa amps. Back then I just ventured to perform the FX loop series/parallel mod. But time went on and I started working a lot with electronics/soldering and repairs while still making music so I gave the thread like 3 full reads and analysis. I feel a lot more confident now with components, terms, diagrams, soldering, safety so went ahead with the mods!

- Replaced CH3 gain pot (it was 230k stock, measured it) to 1Meg and left the cathode resistors untouched: Instant tons of gain, while mushy around 8 to 9 o'clock. Still, much better! — This is a 2006 3CH Solo Head. It always sounded like crap for tighter tones and always did Ok with vintage 'Brown sound' stuff. It always felt odd and was always stashed away at home. Using a clean boost was an absolute need for like 80% of the applications.

- Jumped (didn't clip) the cathode resistors on V1 to V3: cleaned up my tones overall, and I'm pretty happy now!! I play a lot of hardcore and this is what I always wanted! It's an absolute shame it took me so much time to finally dive in! Jumping the cathodes resistors definitely solved the clarity issue once and for all.

- I'm replacing the CH2 gain pot from 225k to 500k. I recon it will work just fine.

It took me a morning to test and apply these two mods, so far too good.

Just a couple things that hoover around my mind.
- I don't tend to run super bright, edgy tones. The mods before mentioned feel superb. With this in mind, would clipping out the resistor/cap + cap circuit help? or would it be too much? I did notice my DR turned a bit more noisy but I'll manage.

- You guys mentioned that placing a parallel cap between D & E power rails would make a 3CH `feel´ closer to a Pre500. How could I locate in the board a proper spot to place it? What would be the effect of such mod tone wise?

- Is there a viable way to slightly tame the granular top top end after all these mods? I know it's part of what makes Rectos what they are, but I had to ask! :b

One more thing, why is there so little information about all these mods? There's no one doing videos about it in YT, just samples (which sound sick lol)!

Hoping to read from you guys,
All the best
JB

Been a while since I've been around but glad you found what you were looking for in the mod!

Personally I'd leave that resistor/cap (2.2M/82pf) in place as clipping them will cause the amp to not pass signal in some modes.
You could put a 5M5 resistor in parallel with the 680k resistor. This will replicate the pre500 circuit, but would add more top end clarity.

Clipping that 10pf cap also opens up the high end a bit.
I don't remember exactly where to solder in that cap in-between the D-E power rails as I own a 2ch Triple but hoping one of the 3 ch guys that have done it will chime in!
 
Optical said:
Providing some feedback after doing some of these mods.

Amp is an early 3 channel Dual Rec, PCB is Rev C+ 2000
The amp has 230kA gain pots, 100k presence pot on ch3.

I shorted the three 100R cathode resistors. I also added a 4n7 cap across the second stage V2a plate resistor (actually it was out of spec and measured 4n1.

Before, the amp was unusable. Huge fizz and flub on the gain channels that no boost would help. The clean ch1 channel has ice pick highs that were awful.

Now, amazing. The 4n cap on the v2a plate has quenched the clean ice pick, and the massive fizz is gone from the gain channels. Gain channels now also sound clearer, more focused in the mids, and tighter.

For three bits of wire and a capacitor this has been a big deal!

Good to hear that the mods worked out for you, crazy how small changes affect the tone so much!
 
Sorry for the necro bump but I just want a small confirmation before I will do this mod since there are 32 pages full of questions and information.

To do this mod (more and tighter gain structuur just like the pre-500) on a dual Rectifier on the red channel, you just have to do the following:

1. Change the gain pots to 1MA. Make sure you swap the cap that jumps the two lugs to the new pot.

2. Swap this capacitor to one valued at .005uF, with a voltage rating of at least 450. (0.0047uF Orange Drop is perfect)

Does this also work on a tremoverb, 3 channel DR and triple rec (2 and 3 channels)?
Or even a dual caliber-5 head? That one could really use a bit fatter, tighter and more gain.

I also read some information about the presence being swapped and doing some other things to resistors and a capacitor (C17?).

What is the complete answer for getting the red channel to pre-500 specs?

Sorry if I missed it on page 1, 28 and other pages.

Thanks for your help 👍
 
Haven't been around in a bit but here's a condensed version of everything:
I went headfirst into this and removed most of these parts instead of jumping them which has the same effect.


install a jumper over R277


install a jumper over R272, change the cap at C55 from .10uf to .0047uf. (the smaller orange drop cap in front of the larger 3)


install a jumper over R271.


Remove R110 (680k) and replace with a 470k, remove R322 and C10 (both which are behind that red cap.


You can jump LDR4 or Clip and jump LDR 4, just cut the leads as close as you can to the body of the LDR and just solder the leads together on both sides.


You can also just solder a jump across the resistors/caps that I've removed if you want to make this reversible.
Another thing you can do to add a little more brightness/cut is to lift C12, opens up the high end a bit, although this cap defines the Rectifier voice (I like it better with the cap in personally)

This includes changing both gain pots to 1 meg, changing the presence pots to 250k.
Doing this will boost your high gain tones significantly, but will however cause your cleans to have massive volume as nothing is holding signal back, and add grit to them (but if you slowly raise the gain you'll find a nice sweet spot) It will also clear up that fizz.

I however rarely use cleans so this was right up my alley.
However, use caution while desoldering/soldering in these tight areas, these traces can lift easily.
You can also do this on the tremoverb which is a 2 ch recto, I'd refer to the schematic since they added new parts and moved around others.
This could be applied to the rectoverb/single rec, I'd refer to the schematics.

EDIT: This can also apply to 3 channel/reborn, roadster/road king.

When Mesa switched to the 3 channel heads they used relays for channel switching instead of LDR's so these 100 ohm resistors simulate the presence of the 3 LDR's on the cathodes of the gain stages. You can add a jumper (reversible) or remove and jump these.

You can add 2 10uF / 450V electrolytic caps and put them in parallel with the D and E power rail supply caps. You'll notice a bigger, bolder tone (this is the big difference between 2 and 3 channel models).

Also now find the D power rail. V2 pins 1 and 6 each connect to 100k resistors, and on the other side of those resistors is the D power rail. Somewhere on this rail, you'll need to connect the capacitor (Which is C55 on the 2 ch heads, .0047uf) to ground. I'm not sure where because I haven't worked on a 3-channel amp, but I'd bet there's a spot on this rail that's physically close to a ground.

3 channel pics:

Reborn:


Old 3 channel:

 
I had to make an account just to chime in on this. I have a 3 channel solo DR. I jumped the 3 cathode resistors, got the 1 Meg gain pots from Mesa, got the 250k presence pot from mesa and got the cap for D power rail to ground.
These changes made the amp amazing, still sounds very much like a DR, just the lows are now tight and the highs are crunchy and useful - not fizzy. The amp before was very 'mushy' now it is what I thought a DR was going to sound like. It is also easier to dial a good tone in.
Thank you all for this thread!!
 
I have a Single Rectifier... Hoping to get a tech to do this on my series 2.

However... Where it says this...

On to the mod!

1. Change the gain pots to 1MA. Make sure you swap the cap that jumps the two lugs to the new pot.

2. Swap this capacitor to one valued at .005uF, with a voltage rating of at least 450. (0.0047uF Orange Drop is perfect)

The image is no longer there... What would this be on a SR series 2? I know nothing about mods.. so be kind haha.

Cheers Paul.
 
The circled cap is C55 from the first intial post, rest of the mod is posted a few posts above.

SDC1019323.jpg
 
EDIT: Much of what's in this first post is incorrect, despite being what I believe is an awesome mod. Thanks to msi, JCDenton6, and many others in this thread, I believe the following is 100% correct:

After everything that's been gone through, it really does seem there's only a slight difference between revisions. Most notable of C/D are the following:

1. Higher presence pot value (220k, I believe, instead of 100k) makes the entire amp brighter
2. No LDRs on the preamp cathodes means a slightly tighter, dryer tone
3. Different output transformer (which, although present on later revisions, I believe plays a role here with the aforementioned differences)


There are other changes, but as far as I can hear, that's what it takes to get C/D red modern. Because of the layout on later 2-channel revisions, there's no simple mod to get 100% accuracy.


I've been interested in the fabled "holy grail" pre-500 tone for years, as I'm sure most are. Through MANY hours of research and testing, I believe I've finally cracked the circuitry code and have found that by swapping TWO parts, your Rev. G Rectifier can have pre-500 tone. Why am I sharing my countless hours of hard work? Because for one, the two parts will take a skilled tech about 5 minutes to swap (and maybe 20 for an unskilled one) and come to a total cost of about $10, not at all warranting the huge amount of money the real pre-500s command. Two, because HOLY HELL it sounds amazing!

So what exactly is the difference in sound? Less flub, bigger midrange, and much more usable gain. At 11:00, the gain is about as much as you'd get from a Rev. G at 2:30 - 3:00. And when you do bring the gain to 3:00 for a huge amount of saturation, it stays tight! What's the drawback? Well, cleans suck again. And the thing is, the stock tone is still awesome. Yes, everything I just said is true, but at low gain settings, the stock setup will be a bit thicker (albeit not nearly as tight). Still, there's no harm in trying this setup, and I highly recommend taking the $10 and ~15 mins and trying it!

Before I get to the mod, here are some clips to show the difference. Please note that I am NOT an expert on recording techniques. These clips are meant to show the difference between the two setups, all else kept the same (except gain settings). No EQ except for a slight high pass filter
Stock
"Pre-500" tone
5150 (for perspective)

I used a Rectifier 4x12, MD421 close, and Studio Projects B1 for the room. Guitar is a Gibson R9 with a BKP Abraxas. Using an Mbox for mic preamps. Settings are as follows:
Treble and Bass: noon
Mids: 12:30
Presence: 8:00
Gain: 1:30 stock, 10:30 on the "Pre-500" (though in retrospect, I'd bring it up a bit in the chorus and down a hair in the verse)
Master: 10:30

The differences are a little more noticeable in the room, but I think they show well enough. Might have had the volume just a little too high.


On to the mod!

1. Change the gain pots to 1MA. Make sure you swap the cap that jumps the two lugs to the new pot.

2. Swap this capacitor to one valued at .005uF, with a voltage rating of at least 450. (0.0047uF Orange Drop is perfect)

IMG_1863.jpg


This should do it! Of course, changing the Red presence control to a 26k linear would be closer still, but the stock 100k gets you the same sound (just has more presence past 9:00).

If anyone else decides to try this, please share your findings! As for me? I like the Rev. G circuit very much, and would like to have both setups. However, in almost every case, I'd take this Pre500 configuration.

I think that covers everything, though please let me know if I've missed something!
HI There I am a bit late to the party just wondering if by any chance could upload the picture again, please
 

Latest posts

Back
Top